
How to Design a Custom Challenge Coin for Your Unit, Team or Organisation
Designing a custom challenge coin is easier when you stop thinking about the finished coin first and start with the reason it is being made.
Is it for a military unit, police team, retirement, anniversary, event, course, club or organisation? Who will receive it? What should they remember when they pick it up in five or ten years?
Once that is clear, the design decisions become much simpler.
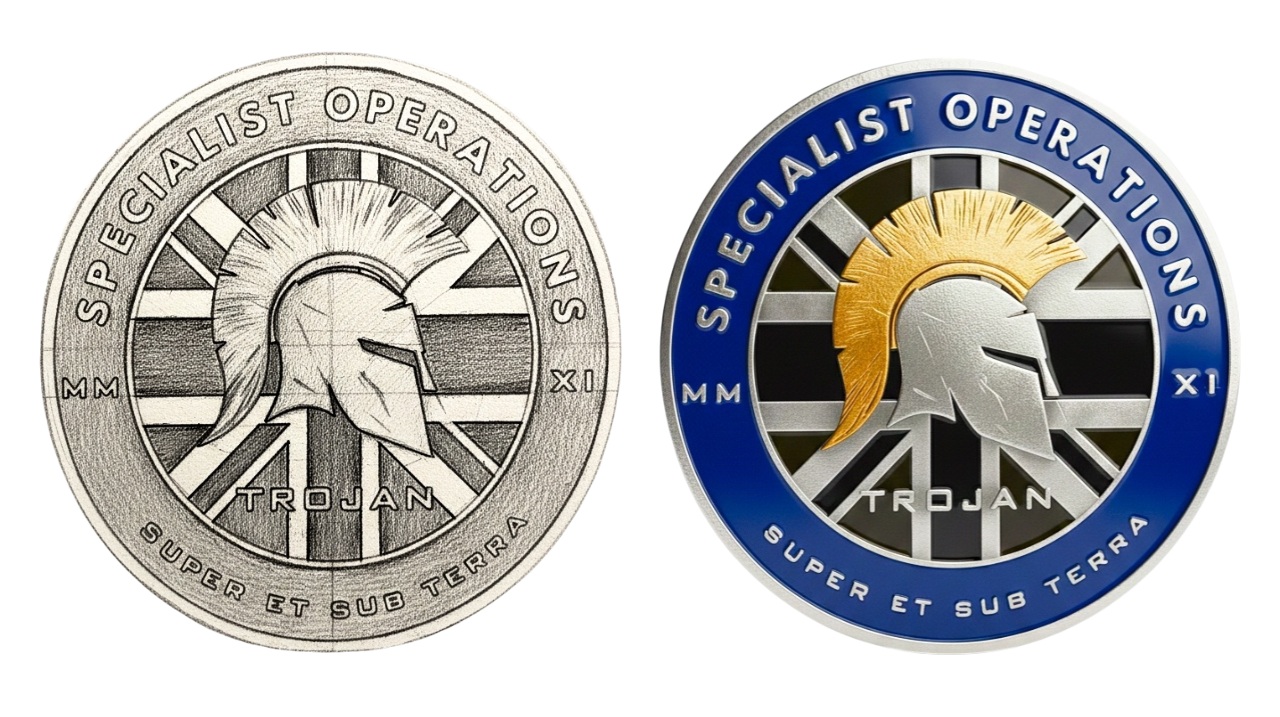
If you already have a badge, logo, sketch or rough idea, you can send it through our custom challenge coins page and receive a free no-obligation quote and artwork proof before production.
1. Decide What the Coin Is For
The strongest challenge coins usually have one clear purpose.
A unit coin may need to represent identity and pride. A retirement coin may focus on service dates and the individual. An event coin may need the event name, year and location. A course coin may need to recognise completion and the people who took part.
Write the purpose down in one sentence before you start choosing colours, finishes or shapes. It will help prevent the design from becoming overcrowded.
2. Choose the Main Symbol or Crest
Most designs need one dominant visual element. This could be:
- A unit or team badge
- A force or organisation crest
- A club logo
- An aircraft, vehicle or piece of equipment
- A building, landmark or location
- A symbolic graphic created specifically for the coin
Do not worry if the artwork you have is not perfect. A clean vector logo is useful, but it is not essential. At Custom Calibers, a rough sketch, reference image or concept can be turned into a digital artwork proof before anything goes into production.
3. Decide What Goes on the Front and Reverse
Using both sides properly gives the design room to breathe.
A common approach is to use the front for the main identity and the reverse for the specific reason the coin exists.
For example:
- Front: unit crest and motto
- Reverse: anniversary date, event, deployment or retirement details
For a police or law enforcement coin, one side might carry the team or force identity while the reverse marks the specialist unit, course or presentation.
For military projects, browse our military gifts collection for wider presentation ideas. For police teams, see our police gifts.
4. Keep Text Short and Readable
A challenge coin is not a plaque. There is limited space, and text becomes harder to read as it gets smaller.
Prioritise what matters:
- Unit or organisation name
- Motto
- Short event or course title
- Dates
- Brief commemorative wording
If a paragraph is needed to explain the design, it probably belongs on a presentation card rather than the coin itself.
5. Choose the Right Coin Size
Size affects both appearance and how much detail can be included.
At Custom Calibers, two common starting points are 1.75 inches (44.5mm) and 2 inches (50.8mm). The smaller size suits cleaner crests and traditional coin layouts. The larger option gives more room for detailed logos, dual imagery, extra text or 3D elements.
Custom sizes and shapes are also possible, including shields, badge outlines and other non-standard profiles.
6. Pick a Metal Plating That Fits the Design
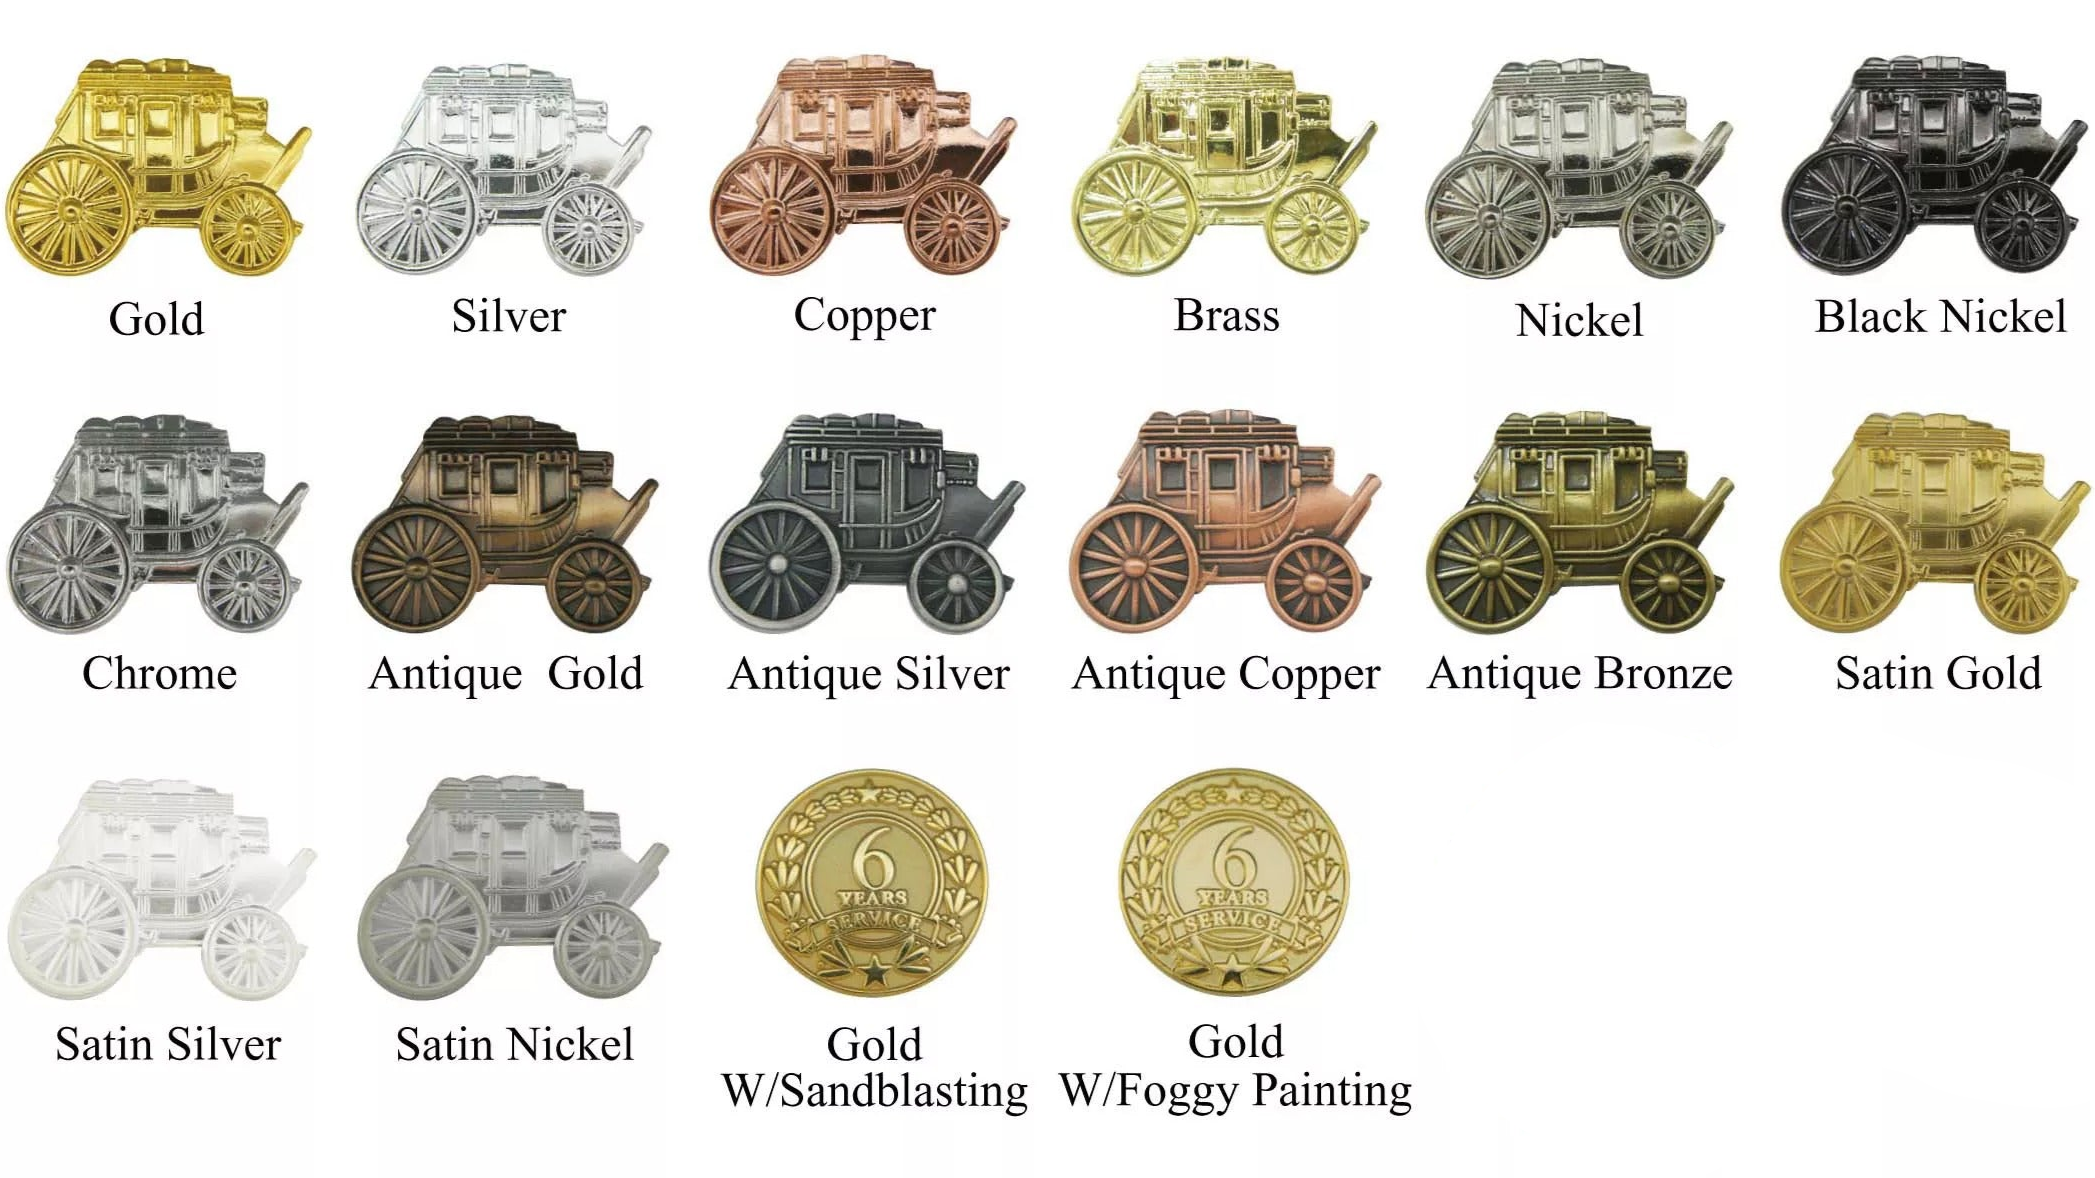
The plating changes the entire feel of a challenge coin.
Bright metal can create strong contrast and a formal appearance, while darker or antique finishes can suit heritage, tactical or traditional designs. The right choice depends on the artwork and what the coin is meant to represent.
Do not choose a finish purely because it looks impressive in isolation. It should support the colours, crest and mood of the design.
7. Decide Between Soft Enamel, Hard Enamel and 3D Detail
These finishes create different visual and tactile effects.
Soft Enamel
Soft enamel leaves the painted areas slightly recessed below the raised metal lines. It gives the coin a textured feel and makes the metal boundaries very clear.
Hard Enamel
Hard enamel is polished smooth so the colour sits flush with the metal lines. The result is a flatter, cleaner finish with a jewellery-like feel.
3D Detailing
3D detailing is useful where the design needs rounded contours or depth, such as faces, buildings, equipment, animals or sculpted crests.
Your artwork proof should make it clear which areas are enamel, metal or raised detail before production begins.
8. Think About the Edge
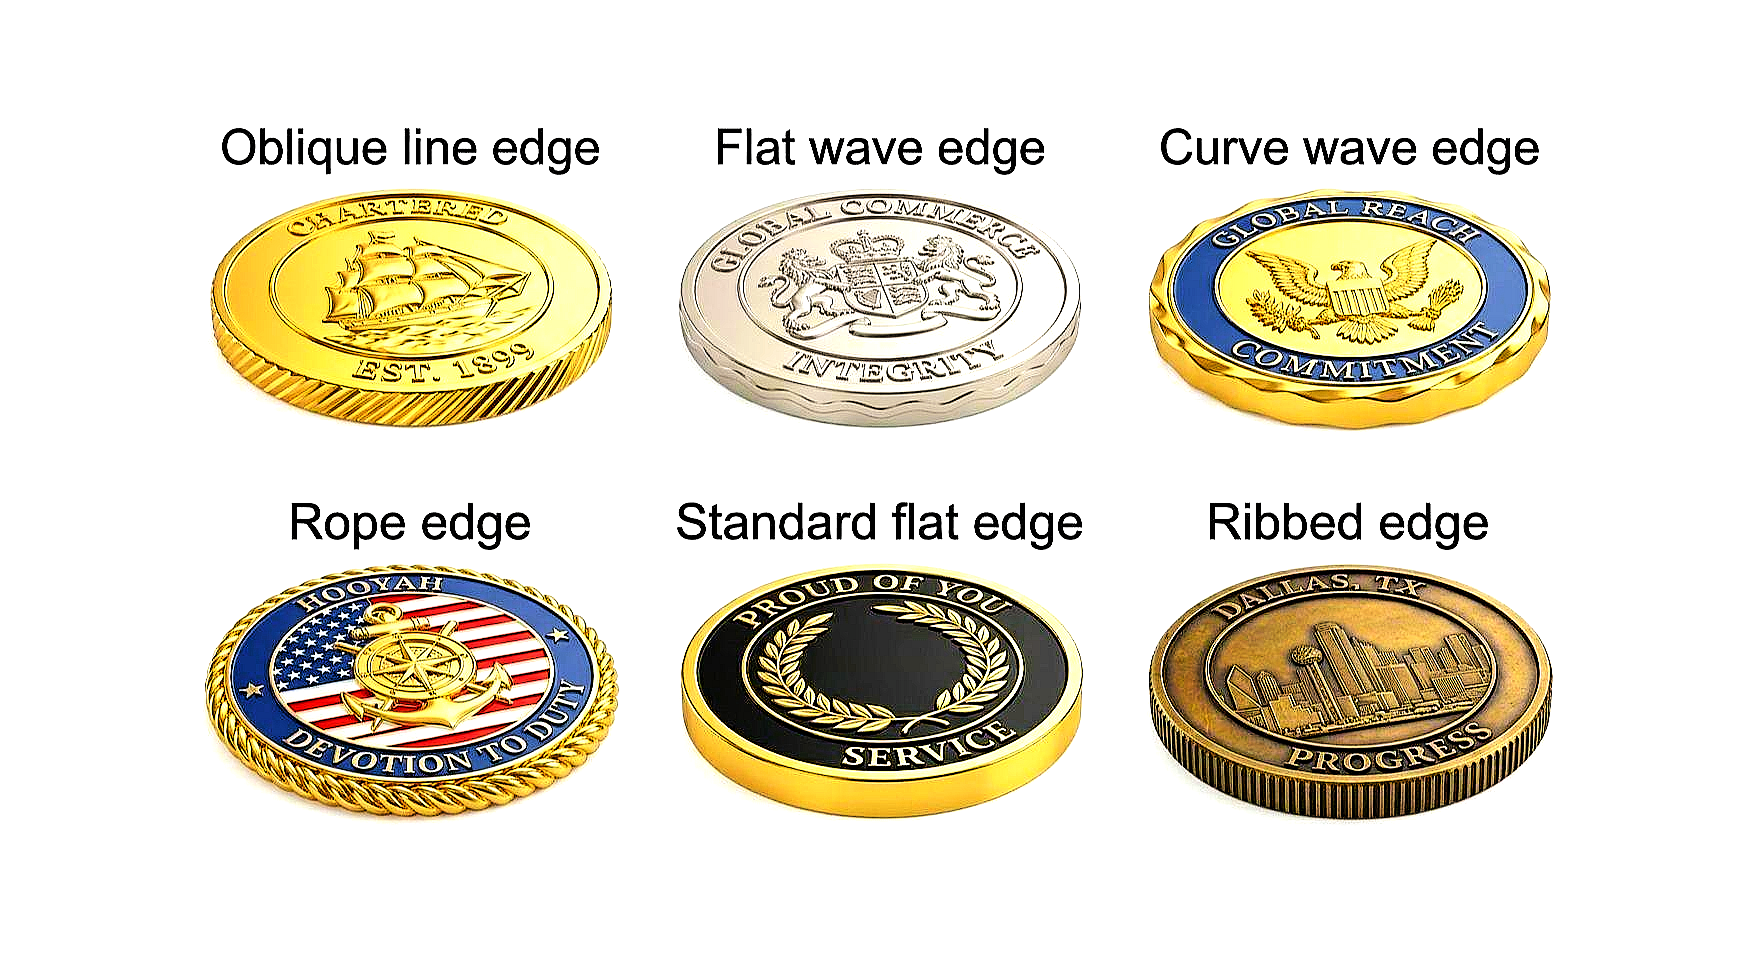
The edge is easy to forget, but it can add a premium finish without overcrowding the face of the coin.
Options can include decorative edge styles, custom edge text and sequential serial numbering. This is useful for limited editions, specialist teams, membership coins or event runs.
9. Use Colour Deliberately
More colours do not automatically make a better coin.
Start with the colours that genuinely belong to the unit, team or organisation. If the badge already has a strong palette, let that lead the design.
Metal areas can often do some of the visual work, so not every section needs to be filled with enamel.
10. Decide Whether You Need Personalisation or Numbering
If every coin will be identical, standard production is straightforward. If you want individual names, numbers or specific details, decide that before final approval.
Sequential numbering can work well for limited runs. Edge engraving can add a phrase, date or identifier without changing the main artwork.
11. Plan the Presentation
How the coin is handed over matters, particularly for retirements, awards and formal presentations.
A presentation box can make a single coin feel more substantial and protects it if the recipient wants to display rather than carry it.
For a wider retirement presentation, challenge coins can also sit alongside retirement gifts or personalised items.
Have a Coin Idea Already?
Send over your badge, sketch, logo or reference images. You will receive a free no-obligation quote and artwork proof before production begins.
Request a Free Artwork Proof Learn About Challenge Coins12. Check the Artwork Proof Properly
The proof is the moment to slow down.
Check:
- Spelling
- Dates
- Ranks and titles
- Colours
- Orientation of logos and badges
- Edge text
- Numbering
- Front and reverse layout
- Size and finish
Do not approve a proof because the overall design “looks right” while assuming the small details are correct. Once production starts, those details are locked in.
13. Allow Enough Time for Production
Custom challenge coins are manufactured products rather than instant-print items, so allow enough time for artwork, approval, production and delivery.
At Custom Calibers, standard production and delivery is typically around three to four weeks after artwork approval and payment. If the coins are needed for a parade, presentation, retirement or fixed event date, include the deadline when you first enquire.
14. Order the Right Quantity
Think beyond the people in the room on presentation day.
You may need spares for future members, replacements, senior visitors, archives or people who cannot attend the event.
Custom Calibers production runs start from 20 coins, which makes smaller specialist-unit and team projects possible without requiring a huge order.
Common Challenge Coin Design Mistakes
The most common problems are usually avoidable:
- Trying to fit too much text onto the coin
- Using too many unrelated visual elements
- Choosing colours that reduce contrast
- Forgetting to check spelling, dates or ranks
- Leaving production too close to the event date
- Designing the coin without a clear reason for it to exist
A cleaner design with one clear purpose will usually age better than a coin trying to include every possible detail.
What Do You Need to Start?
You do not need finished artwork. To start a project, useful information includes:
- Your logo, crest, badge or rough sketch
- What the coin is for
- Approximate quantity
- Target size if known
- Preferred colours or plating
- Any names, dates or wording
- Your required delivery date
From there, the design can be refined into a proper artwork proof.
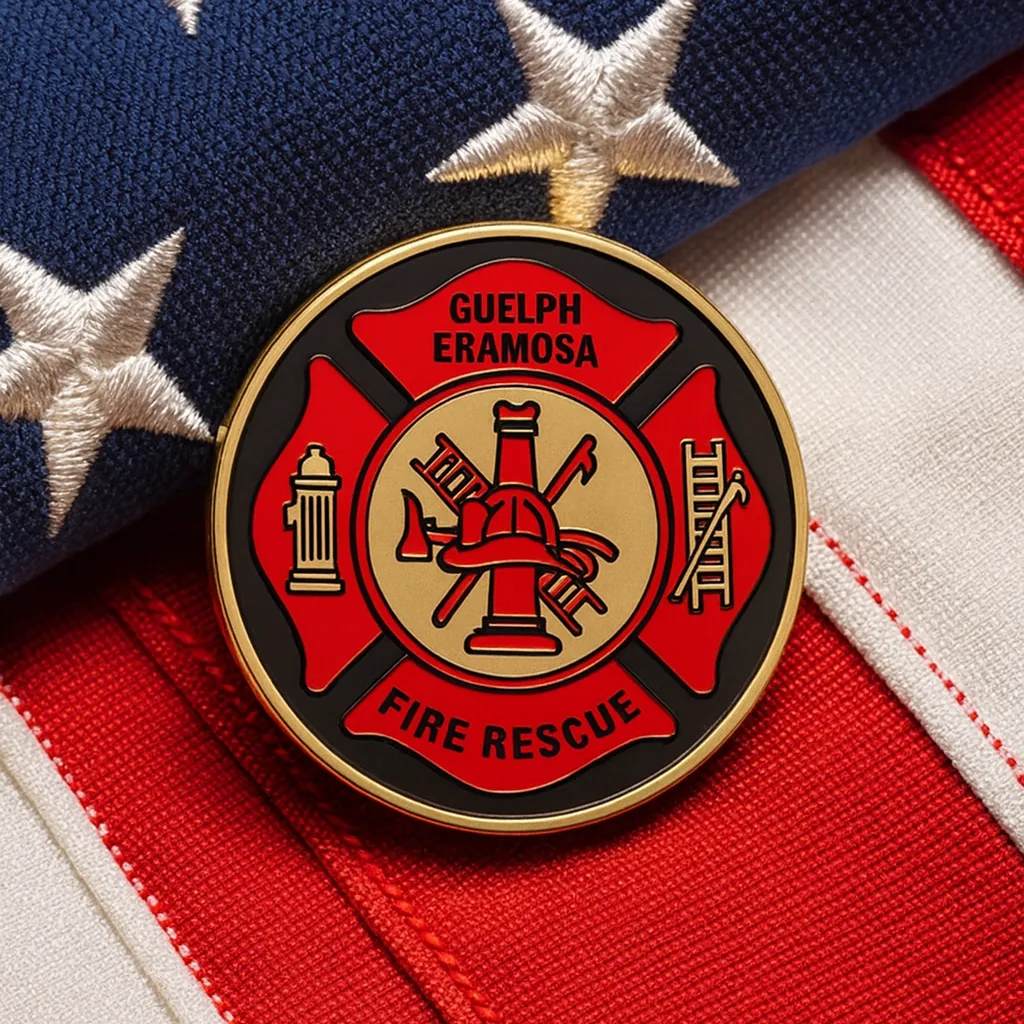
Start Your Custom Challenge Coin Project
Orders start from 20 coins. Tell us the quantity, deadline and what you want the coin to represent, and we can take it from there.
Get a Quote Browse Police GiftsStart Designing Your Custom Challenge Coin
If you have a clear design already, send it over. If you only have a crest and a rough idea, that is enough too.
Visit our custom challenge coins page to see finish options, pricing guidance and the full quote form. You will receive a free no-obligation quote and artwork proof, giving you the chance to refine the coin before production begins.